GitHub Setup
GitHub
“GitHub is a cloud-based platform where you can store, share, and work together with others to write code.” (See About GitHub)
The following are very brief instructions to get started. (For more information, see https://
Sign in/up at GitHub. If you already have an account (or have a google account), go to “Sign in”. If not, then go to “Sign up”.
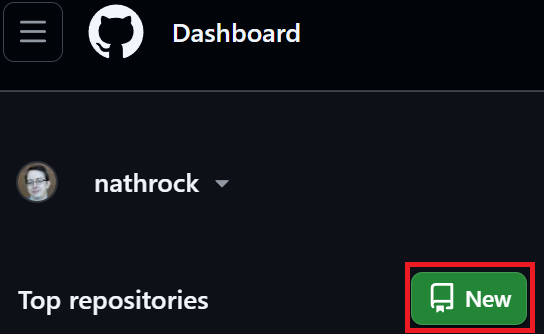
On Home/Dashboard, click “New” to create a repository (repo).
Name it after the class you’re in, e.g., “ECON304”.
Under “Choose visibility” select “Private” (until you’re ready for the world to see your work).
Optional: If you eventually/plan to do a lot of collaborative programming with different integrated development environments (IDEs such as Stata, RStudio, MATLAB, VS Code), then I recommend installing GitHub Desktop.
You may create and edit Jupyter Notebooks remotely (recommended) or locally (optional). The following are instructions on how to setup git for either choice.
Remote Setup
I recommend this setup first as it does not require installing any software, and you can program and work collaboratively in any browser from any computer.
Log in to https://
jupyterhub .wm .edu with your W&M credentials If prompetd, select “Default Notebook (A Python3 SciPy Notebook)”
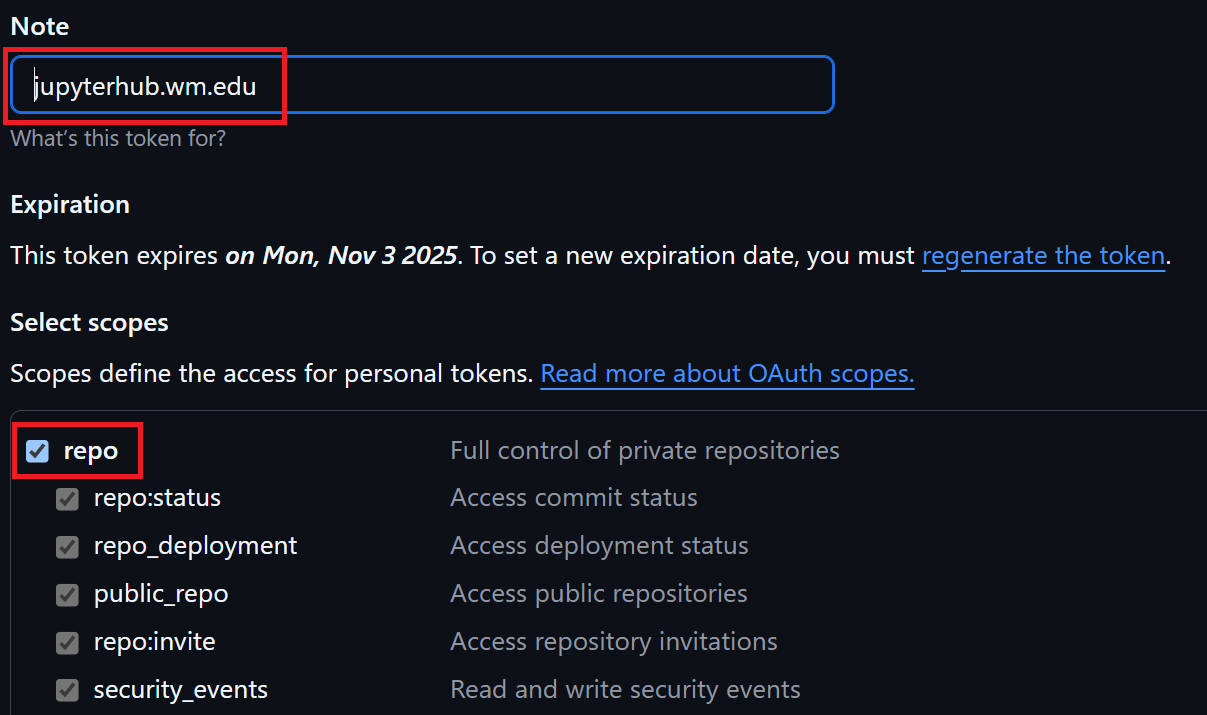
Go to https://
www .github .com /settings /tokens and create a personal access token. Put “jupyterhub.wm.edu” for the note.
Under “Select scopes”, check the “repo” box.
Find the URL to your repo, e.g.,
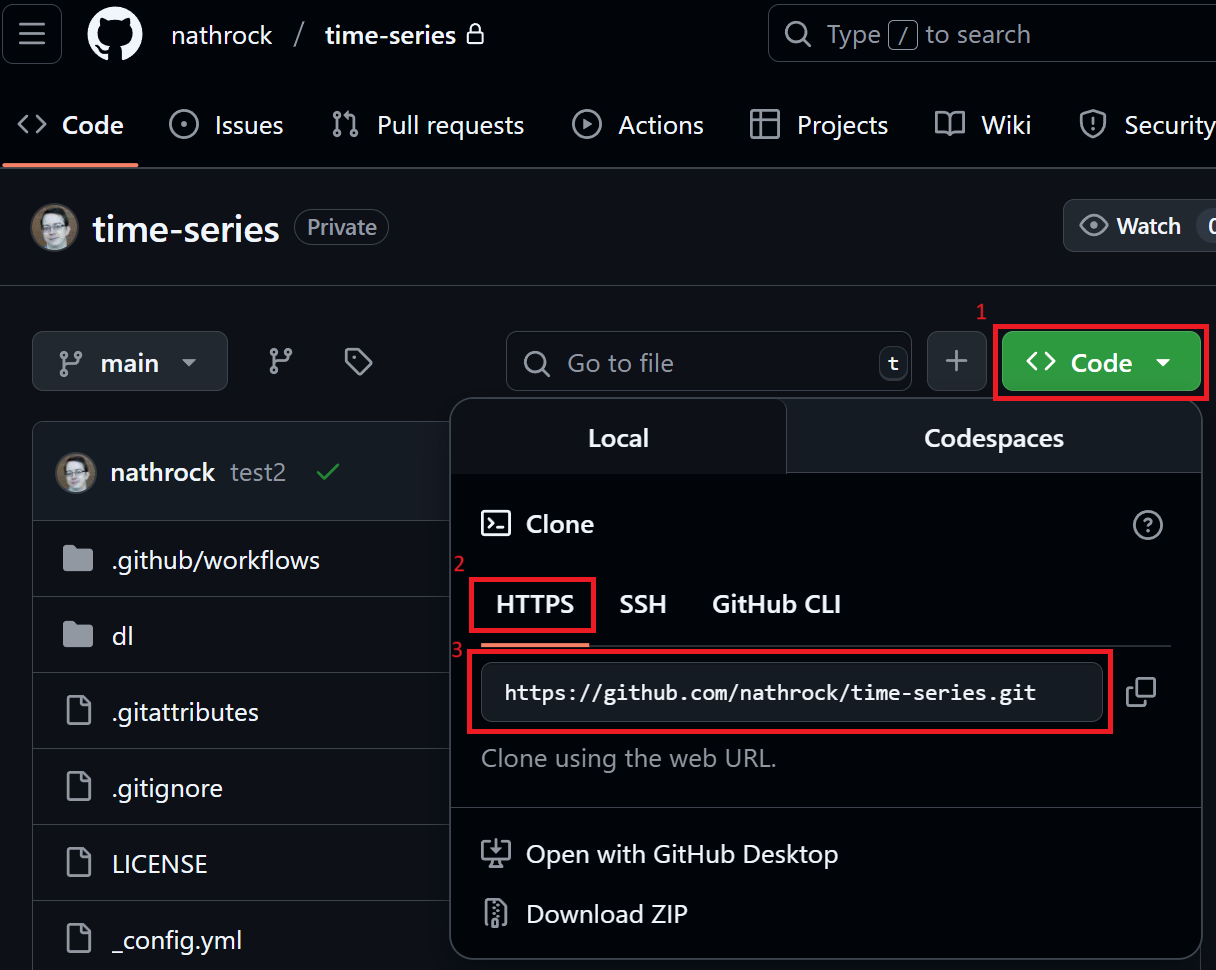
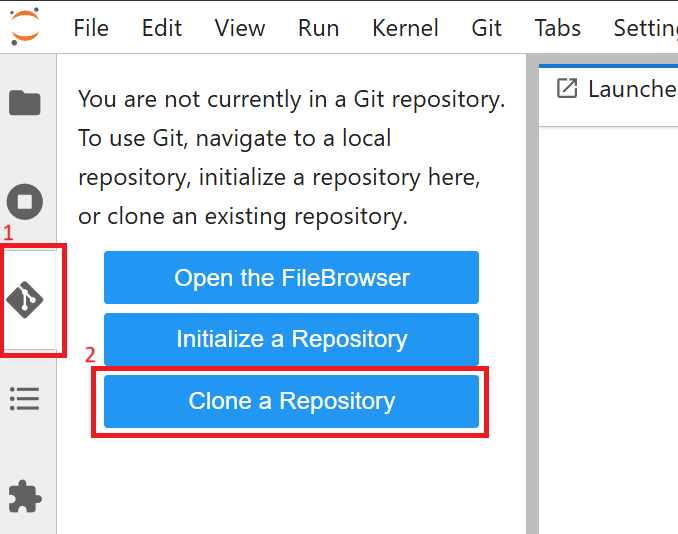
JupyterHub, Git tab, “Clone a Repository”, enter URL to repo, username and token.
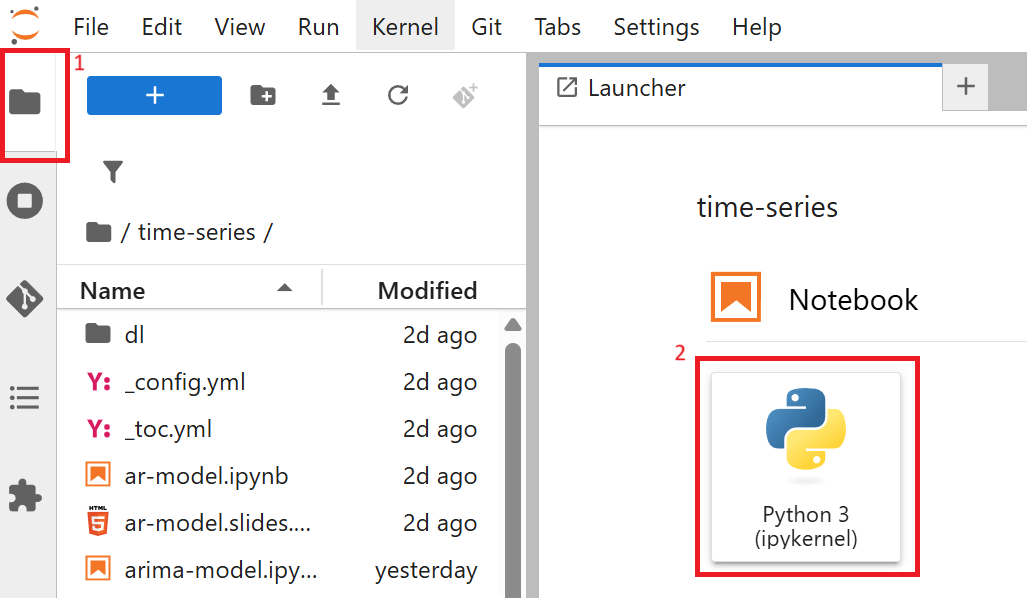
In the Launcher tab, click the “Python 3 (ipykernal)” button to create a Jupyter Notebook.
Git
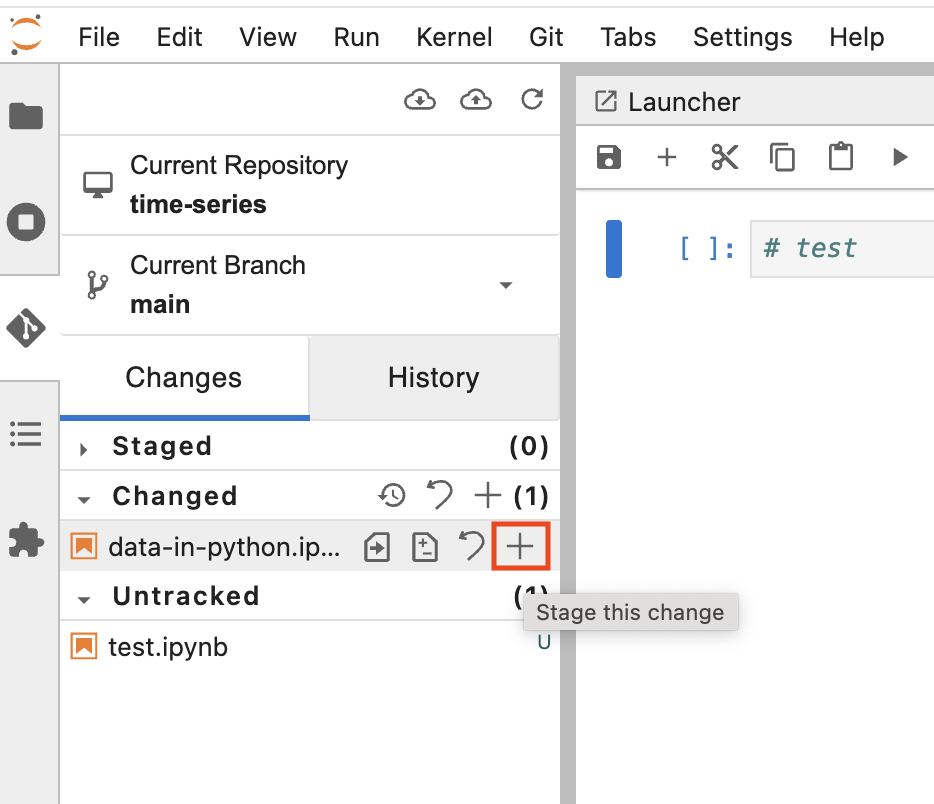
Once you are done editing and save a notebook, on the Git tab you can “Stage this change”
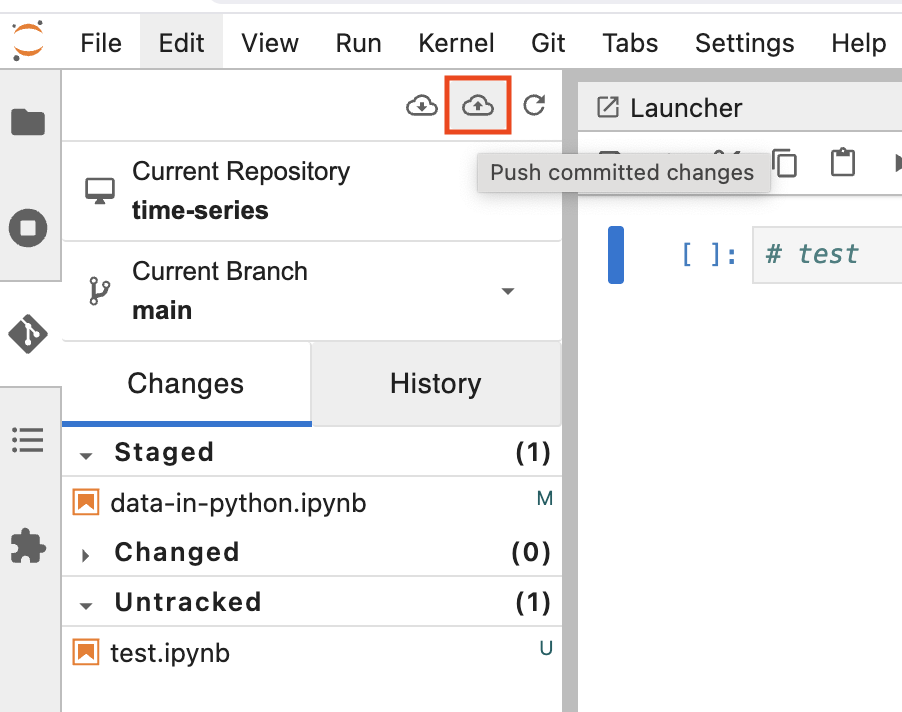
When you are ready to push changes to your repo, on the Git tab you can “Push committed changes”
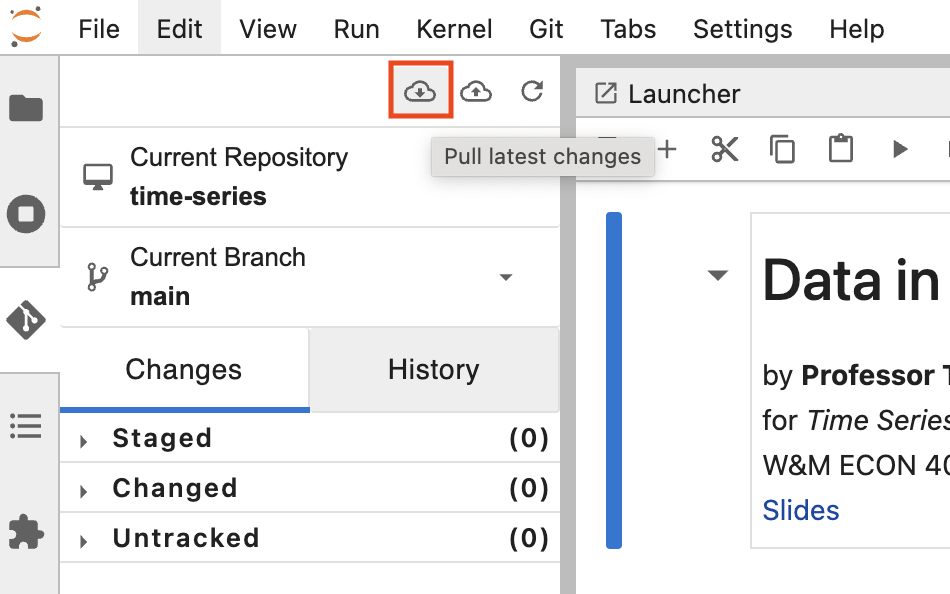
To get the most up-to-date files from the repository, on the Git tab you can “Pull latest changes”
Local Setup
While the Remote Setup makes it easy to get started, the interface is simple and there is no AI assistant. VS Code is a sophisticated IDE that supports lots of languages, including Python, has an extension to support Jupyter Notebooks, and has GitHub Copilot built-in.
Download and install VS Code for your operating system https://
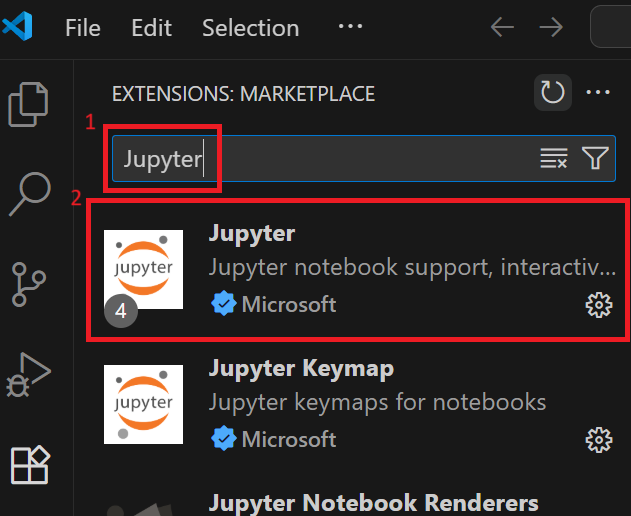
code .visualstudio .com /Download Open VS Code, go to “Extensions” tab
Search for “Jupyter” and install the extension.
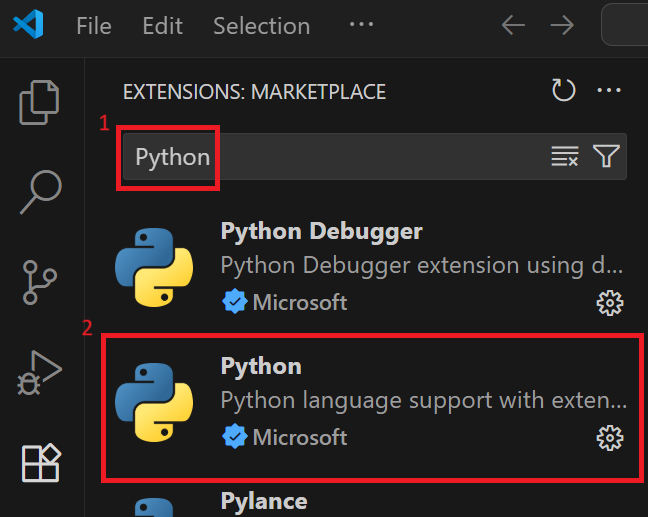
Search for “Python” and install the extension.
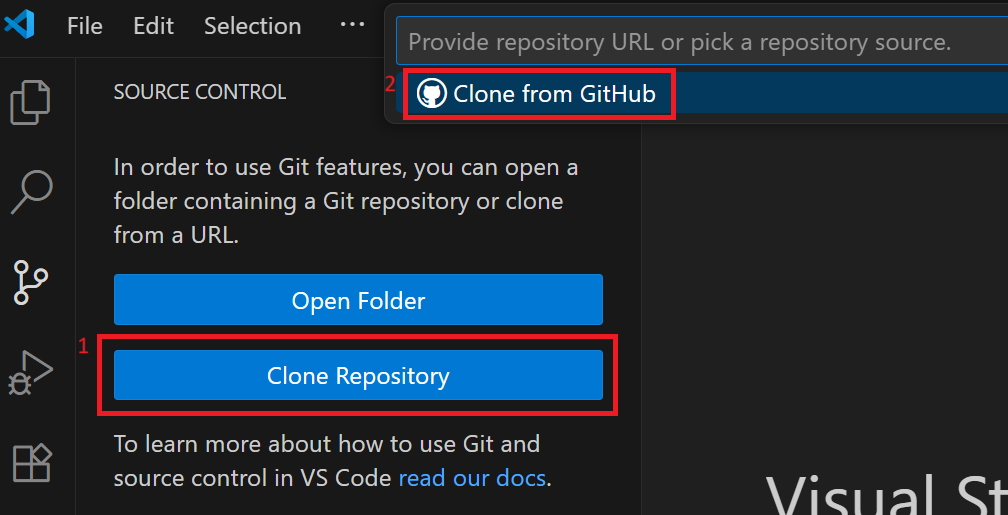
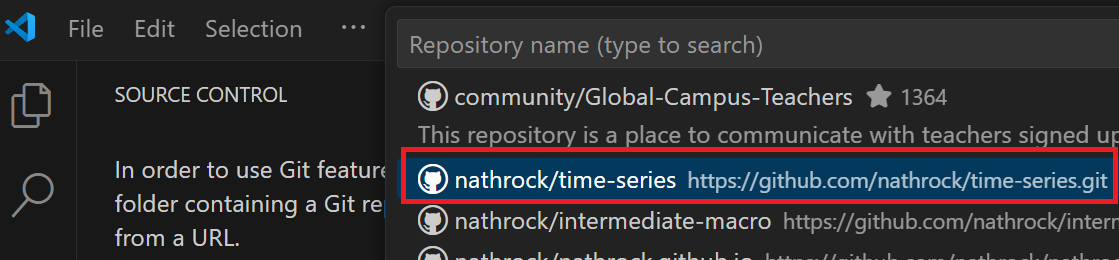
Optional: If not using GitHub Desktop, go to the “Source Control” tab
Click “Clone Repository”, then click “Clone from GitHub”.
Log into GitHub in the browser
Go back to VS Code, click "Clone Repository " and select the repository from the drop down menu.
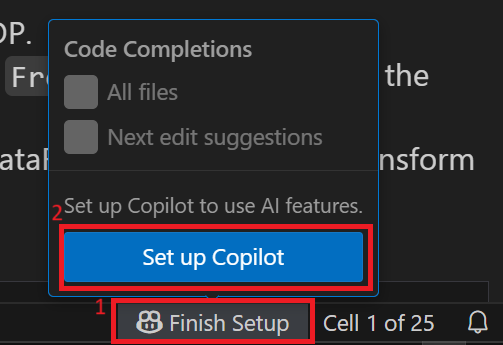
Optional: If Copilot is not already set up, click “Finish Setup” in the lower-right corner, then click “Set up Copilot”.